Capturing the essence of a city or a subject with an iPhone is about more than just snapping a quick shot. It’s about working the scene, experimenting with different perspectives, and finding those angles that make your photos unforgettable. In this guide, we’ll explore how to make the most of your iPhone’s camera to get unique and dynamic shots that capture not just the subject, but the story behind it.
1. Starting with the Basics: Embrace Imperfection
Before you even begin aiming for the perfect shot, let go of the pressure for perfection. The first few photos you take will likely not be great, and that’s okay. Starting with some bad photos is a necessary part of the process. As you experiment, you’ll get closer to finding the angle that truly works. It’s important to remember that the perfect shot won’t always present itself immediately.

When you’re out exploring a location, like the Plaza de San Francisco, or in front of a museum, take a few shots just to get a feel for the environment. Focus on observing the scene first, allowing your eyes to adjust to the surroundings. Then, start moving around to see how the light and elements interact with your subject. Experiment with framing and avoid the temptation to rush.
2. Understand Your Scene: Identify What to Include or Exclude
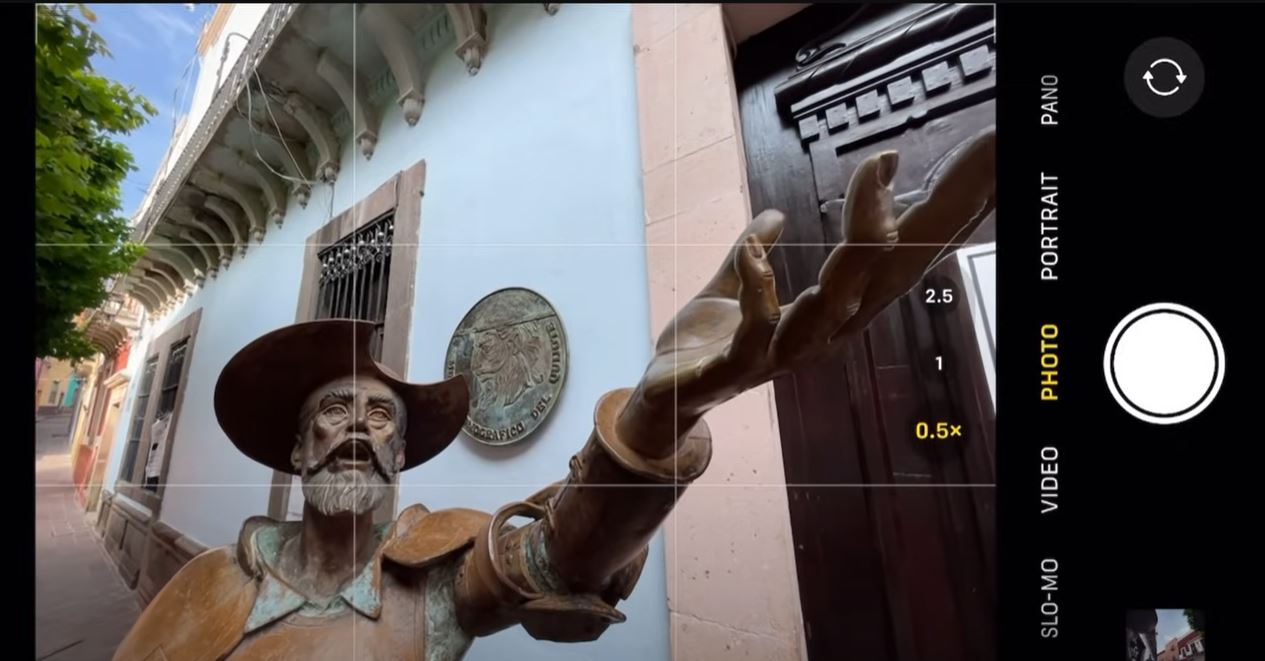
Every scene has its own elements, and understanding these elements is crucial. What do you want to emphasize in your photo? Are there distractions in the background that need to be eliminated? For example, in a busy urban setting like the Museum of Don Quixote in Mexico, the colorful vibrancy of the area might be contrasted with distracting signs, trash, or other unwanted elements.

To get a cleaner composition, think about what’s crucial for the shot and what’s not. Use the “traffic light” method:
- Green: The most important part of the scene (the sculpture of Don Quixote, in this case).
- Yellow: Elements that are neither helpful nor harmful to the shot (like emblems or signs).
- Red: Distractions that should be removed (a sign or other bright object drawing attention away from your subject).
By keeping this method in mind, you can begin to fine-tune your photos and remove unnecessary distractions. Pay attention to your composition, like how much of the statue is cut off or if the background is too cluttered. Shift your angle, move around the subject, and keep your eyes open for the best frame.

3. Play with Angles: Find a Fresh Perspective
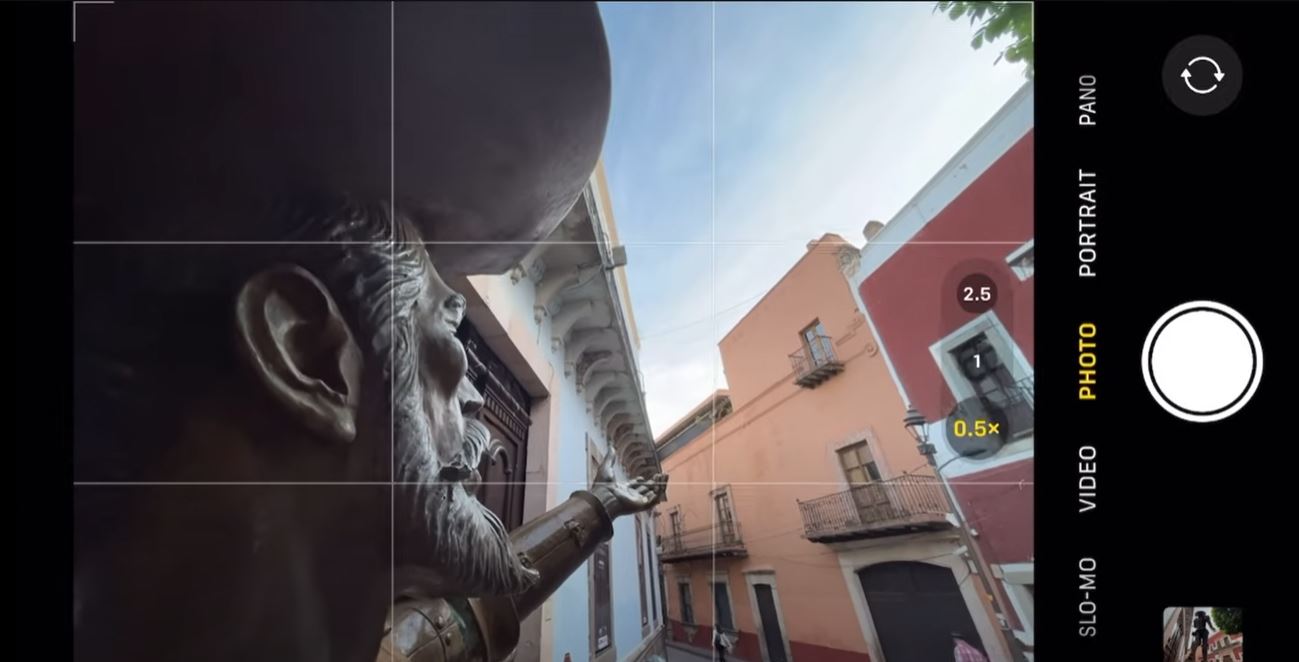
The key to a memorable iPhone photo is finding a unique angle. Rather than always standing straight in front of your subject, experiment with unusual perspectives. Try shooting from a low angle or an off-center perspective to add dynamism to your image.
In front of a statue like Don Quixote, try crouching low to the ground and shooting upward. This can create a powerful silhouette, especially when the sky changes color, and you expose the image to emphasize the statue’s shape. Playing with lighting, shadows, and angles will yield more dynamic results, often capturing something more imaginative than the standard tourist shot.
4. Get Close, But Use Wide Shots Creatively
When you’re using an iPhone, sometimes the best shots come from getting closer to your subject. For example, getting right up to a statue can give the photo an immersive, almost intimate feeling. A wide shot, on the other hand, can offer context, telling a more expansive story of where you are.

A wide-angle lens on your iPhone lets you play with depth and scale, making scenes look even more dramatic. If you have a subject in the foreground, like Don Quixote, you can use a wide lens to bring the surroundings into the shot, creating a sense of space and placing the subject within a larger context.

Don’t shy away from trying super-wide angles. Sometimes, the contrast between what’s near and far can be more striking, especially when there’s a big architectural backdrop or an intriguing landscape in the distance.
5. Take Advantage of Natural Light
Light is one of the most important aspects of any photo, and using the natural light to your advantage can transform a good shot into an unforgettable one. For instance, early morning or late afternoon light can add warmth and drama to your photos. Even the direction of light—whether it’s side lighting, backlighting, or overhead—can change the way a scene looks.

For example, when photographing a statue under a bright sky, the light might wash out details if you’re not careful. If you adjust the exposure on your iPhone, you can prevent overexposure and highlight more of the details on your subject. An iPhone’s HDR (High Dynamic Range) feature works wonders when trying to balance shadows and highlights, giving you a more natural-looking image.

6. Utilize Foregrounds and Frames for Depth
One of the secrets to making your iPhone photos stand out is using natural framing elements. This can include anything from tree branches to doorways, windows, or even the feet of another statue. These framing elements guide the viewer’s eye to the main subject and add depth to the shot.

For example, if you’re capturing a statue, you might place the feet of another statue in the foreground to create a sense of scale or draw attention to the subject. Experiment with different compositions to see what works best for your photo. This simple trick can elevate a standard shot into something much more engaging and dynamic.

7. Post-Processing: Don’t Forget Editing
After capturing your images, don’t forget about post-processing. iPhones have built-in editing tools that can help fine-tune your photos. You can adjust the brightness, contrast, saturation, and even crop the image to perfect your composition. However, be cautious not to over-edit. Aim to enhance the natural beauty of the shot, not to make it look overly artificial.

Additionally, you can use third-party apps like VSCO or Lightroom for more advanced editing features. Sometimes, even small tweaks to shadows, highlights, or vibrance can make a huge difference.
Conclusion: The Art of the iPhone Photo
Mastering the art of taking incredible photos with your iPhone is about more than just knowing the technical details—it’s about seeing your environment in a new light and experimenting with your surroundings. The best angles for unforgettable iPhone photos often come when you let go of perfection and embrace the process of discovery.
